
We love to interact with images online. In fact, we expect it. Pinterest, Facebook, and Instagram continue to prove this. With that in mind, it makes good sense to add an image to your website whenever possible. And, adding images in a mega menu is another great opportunity to give your users the interaction they need.
Adding images to a mega menu is a smart solution to improve the navigation of your website. Mega menus allow users to see more links all at once without the hassle of scrolling, hovering, and remembering the contents of your menu. Images also enhance the menu by grabbing their attention to further simplify the navigation process.
There are useful plugins out there that will do this for you. However, since Divi comes with a mega menu functionality already built in, it’s best to take advantage of this feature and add images to the mega menu without the use of a plugin.
Enjoy!
Implementing the Design with Divi
Creating the Mega Menu
To get started we must first create the menu. For this example I’m creating one main parent menu item called “Mega Menu” with four sub menu items under it. Each of the four sub menu items have three sub sub menu items. Here is the breakdown for clarity:
- Mega Menu
- About Us
- Our Team
- Our Mission
- Company History
- Services
- Web Design
- Web Development
- SEO
- Our Work
- Blogs
- E-commerce
- Corporate
- Contact Us
- Support
- Directions
- Jobs
- About Us
In the WordPress admin dashboard, go to Appearance → Menus. Click create a new menu and give it a name (something like “Mega Menu” should do).
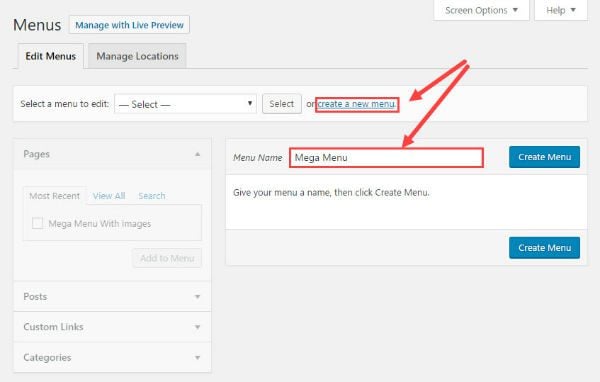
Now start adding the links to the menu. I’m using custom links for this example but you can use existing pages, posts or categories if you want.
To add a custom link, click to toggle open Custom Links and add your url and Link Text. Repeat this process for all of the links.
Note: For this example I’m simply adding a hashtag (#) in the url text box to serve as a mock link which will not link to anything.
Now create one more link to serve as the mega menu link. I named it “Mega Menu” to make this clear. This is the link that will display your mega menu on hover.
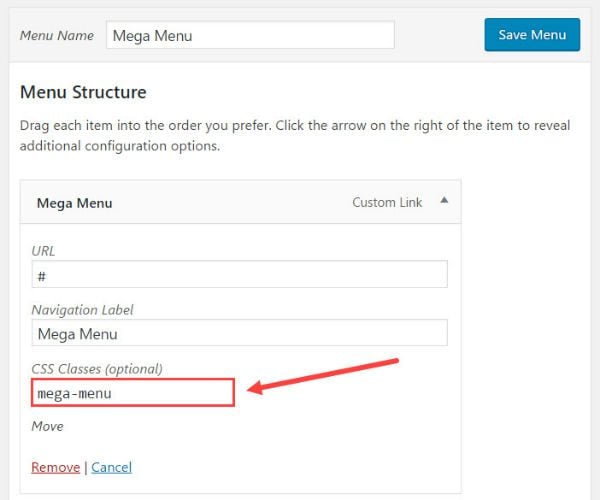
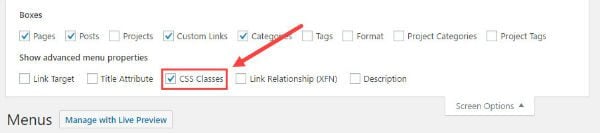
Turning your menu into a mega menu is quite simple. All you need to do is add a css class to the main Mega Menu item you just created.
To do this, click the arrow on the right of the Mega Menu item to reveal additional configuration options. Find the text box labeled CSS Classes and enter “mega-menu.”
If you don’t see the CSS Classes text box, click the Screen Options tab at the top right of Menus screen.
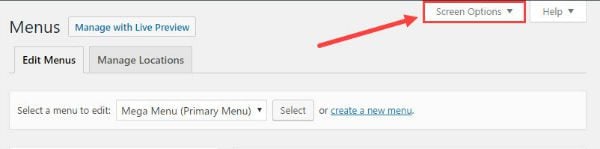
Under “Show advanced menu properties” make sure CSS Classes is checked.
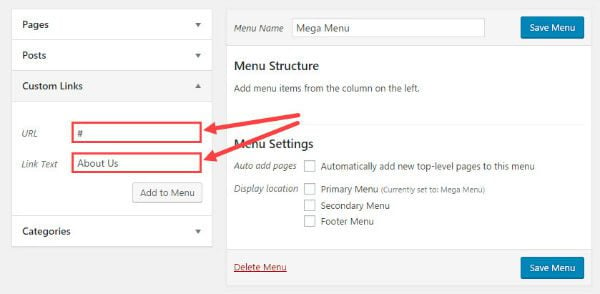
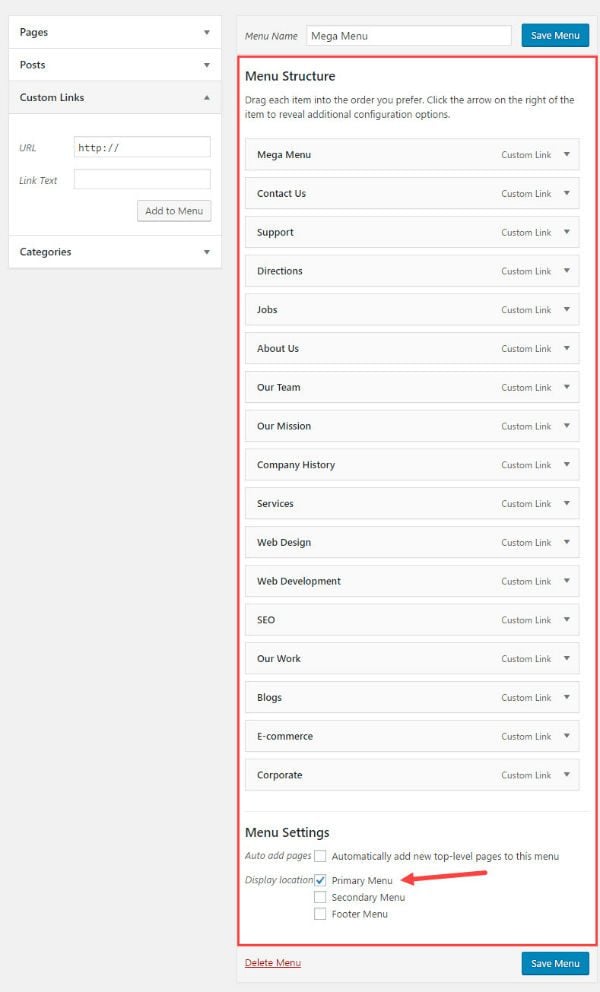
Once the links are added to the menu, scroll down to Menu Settings at the bottom of the menu screen and select Primary Menu for the display location. Your menu should now look like this.
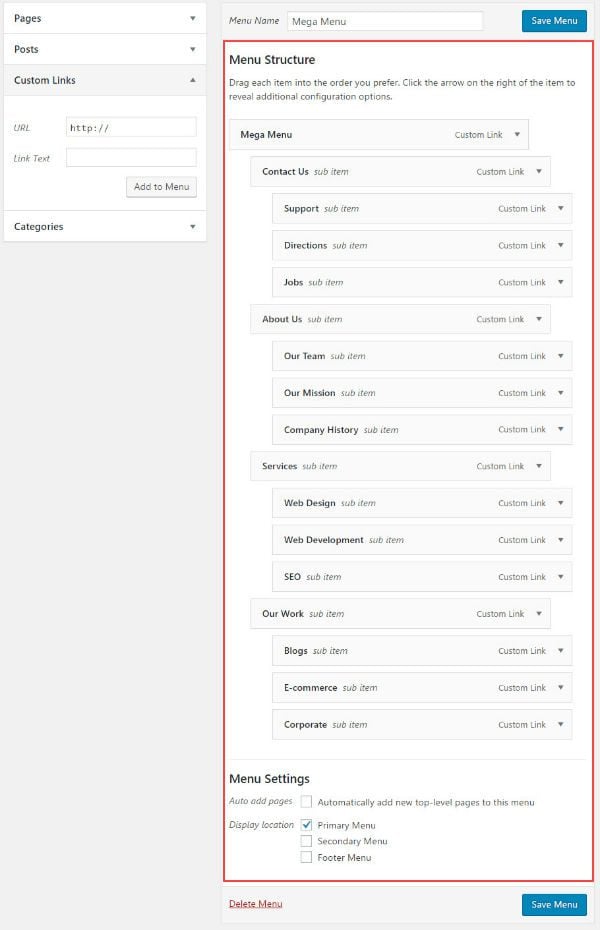
Now organize/drag the four menu items (each with three sub items of their own) to become sub items of the main parent Mega Menu link.
Now your menu should look like this:
Click Save Menu
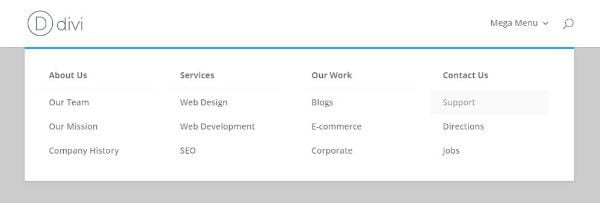
Now let’s see what the mega menu looks like so far on the live site.
Adding Images to the Mega Menu
Now that the menu is ready, it is time to add the images.
Start by getting four images. These images should relate to the four sub menu items (About Us, Services, Our Work, and Contact Us). I picked mine from unsplash.com.
Use a photo editor to shrink and crop each image to have a width of 500px and a height of 300px.
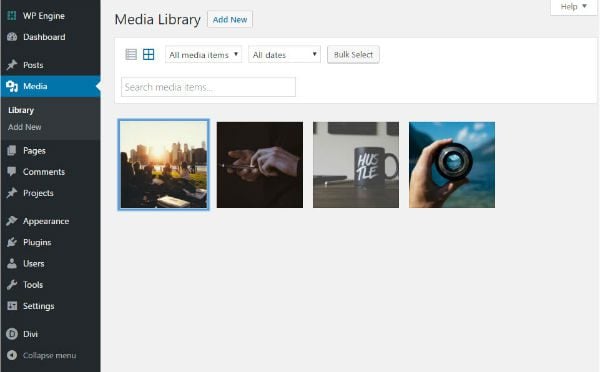
Add/drag them to the WordPress Media library.
Now go back to the menus page in WordPress Admin.
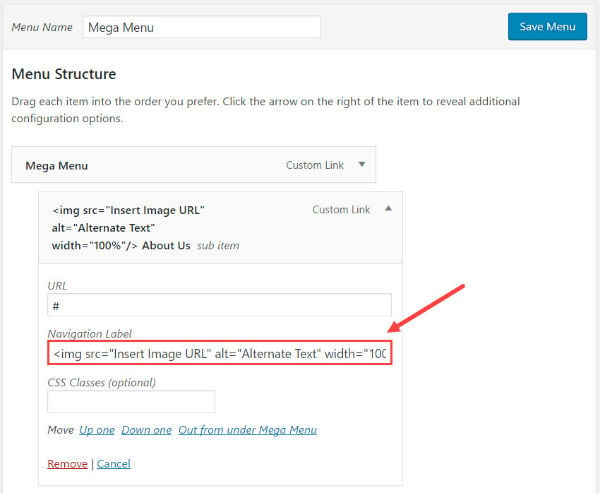
In this example the top link in my first column is “About Us”. Click the arrow on the right of the “About Us” item. In the Navigation Label box add the image you want using the html img tag directly before the text “About Us”. The image tag should look as follows:
01
| <img src=”Insert Image URL” alt=”Alternate Text” width=”100%” /> |
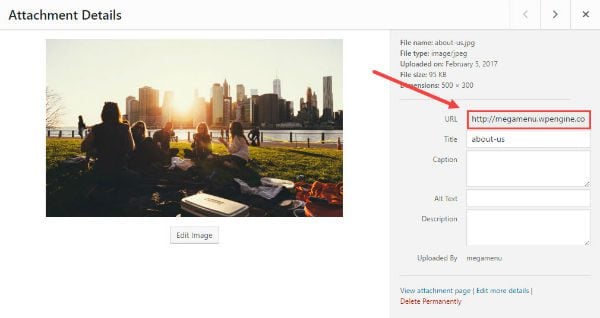
To find the url to the image, go to Media → Library. Click the image you want to add. In the Attachment Details popup screen find the url in the section to the right, highlight it, then use ctrl+c to copy it to your clipboard.
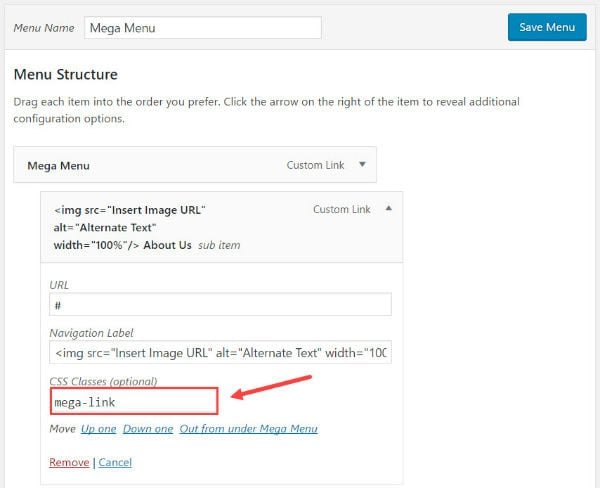
Now go back to the “About Us” menu item configuration on the menu page and replace the text “Insert Image URL” by pasting the url of your image using ctrl+v.
Before you leave the configuration options for the “About Us” menu item, find the CSS Classes text box and enter the class “mega-link”.
This will allow us to add some custom styling later on.
Repeat this process to add the next three images to each of the sub menu items along with the “mega-link” class. (In this example the three items left are “Services”, “Our Work”, and “Contact Us.”)
Go to your site and hover over the mega menu link. Now your mega menu should look like this:
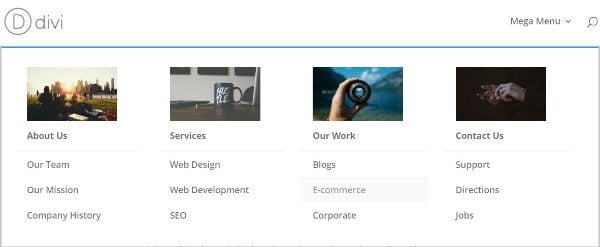
Notice that when you hover over each of the images, the images have a fade effect along with the sub menu item directly underneath. This is because the image is part of that link, so clicking it will bring you to the associated URL.
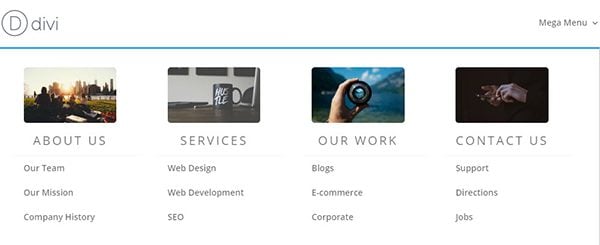
Final Touches
For this last step, add custom css to the menu to make the text font bigger and centered. Also, give a border radius around the image to make it look cleaner.
In WordPress Admin, go to Divi → Theme Options. Scroll down to the custom css box and enter the following css:
01
02
03
04
05
06
07
08
09
10
11
12
13
14
15
| .mega-link > a { text-align: center; font-size: 20px !important; text-transform: uppercase; font-weight: 400 !important; letter-spacing: 3px;}.mega-link > a img { margin-bottom: 8px; -webkit-border-radius: 5px; -moz-border-radius: 5px; border-radius: 5px; } |
Save Changes
Final Result
You’re all done!
You have a Divi mega menu with images without having to use a plugin. Take advantage of this addition for your current site or next project to improve navigation. This kind of menu works especially well for e-commerce sites that have a lot of content and require product images. Hope you find it useful.


No comments:
Post a Comment